As winner of numerous international awards, Bruschi Spa is known for its innovative approach in design and technology. We are glad to share our insights and experiences with the industry members.
Tools of the metrology laboratory

In this post, focused on the metrology laboratory, we will describe the devices employed to measure and test zinc alloy die casts intended for different market sectors.
Introduction
In a previous post we discussed the importance of the metrology laboratory in a zinc alloys die casting productive plant. The metrology laboratory, in fact, assures the quality of the products throughout the production chain by guaranteeing the compliance to the requirements of the customer from a dimensional, structural and chemical point of view. The activities of the metrology laboratory described in the post Dimensional measurement: production control and reverse engineering are:
- Constant monitoring of each production cycle
- Fast checks of new projects and sampling
- Checks of projects that have undergone changes over time
- Control of parts incoming from external suppliers
- Reverse engineering, both on the product and the mold
To deepen these themes, we suggest you to read the post.
In this post we will instead examine different devices paying special attention to the need to choose the most appropriate tool on the basis of the characteristics and the requirements of the product.
Importance of the metrology laboratory
The presence of a metrology laboratory in the production plant is not enough to guarantee the quality of the products: in fact, this result can only be achieved through the employment of appropriate tools for the component to be tested. The set of devices must be up-to-date, advanced and comprehensive of different technologies, in order to allow the minimization of risks that is necessary to meet the requirements of the customer.
This is particularly true in a plant that employs zinc die casting technology for products intended for different market sectors: the variety of products corresponds to a diversification of the tools and of the technologies that the metrology laboratory needs in order to carry out its analysis.
To be specialized in different market sectors allows the competences acquired in a sector to be transferred in another and this is also true for the tests of the metrology laboratory. The choice of the tool in fact is not only determined by the requirements of the customer or by the necessary documentation in the different stages of a project, but it is also defined by the necessity to obtain the most indicative and effective data for the assessment of the compliance of a component with the design standards. The expertise acquired in the measurements of the components intended for a sector can then be transferred to the analysis that are necessary in another sector with advantages that affect the entire production chain.
The tools of the metrology laboratory
After depicting the importance of the metrology laboratory let’s now analyze the tools that allow the metrology tests to be complete and effective.
Industrial computed tomography
The technology of industrial computed tomography, referred to zinc alloys die casting, has a double usefulness. In fact, it allows defect analysis on the internal structure of the components aimed at detecting defects in the internal distribution of the material and thus at identifying porosity and air inclusions. Moreover, thanks to tomographic analysis, it is possible to evaluate the success of the assembly of components. In the case of the assembly of different materials the tomographic analysis allows a functional evaluation of the clearances between assembled parts and the verification of the absence of flaws such as air inclusions or deformations.
3D Scanner
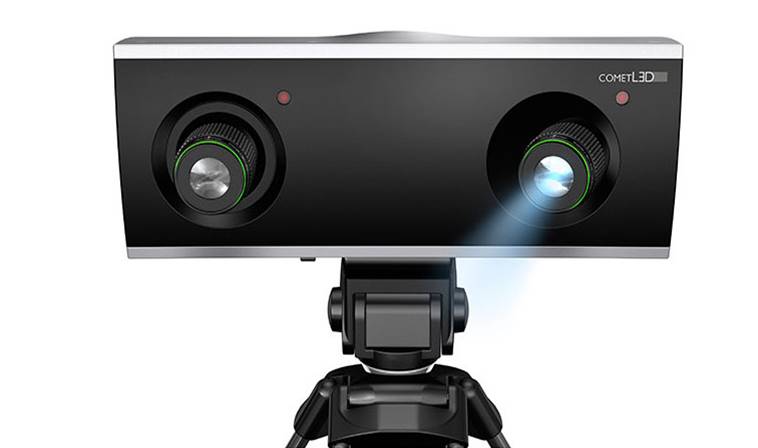
3D Scanner is particularly suitable in the case of components with complex shapes. The device is less accurate than a Coordinate Measuring Machine (CMM), but it allows the capture, without contact, of all the visible surface of the measured object and it makes the comparison with the theoretical model possible. For this reason, whereas a test with CMM would be too time-consuming for the necessity of a complete reconstruction of the shape of the object, the 3D scanner allows the result to be obtained rapidly and effectively.
CMM

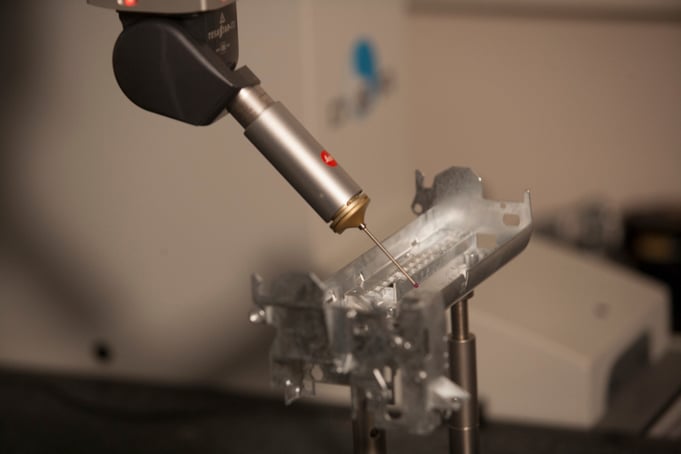
In a metrology laboratory CMM is surely the most common technology. The machine allows the selection of the desired areas and the execution of very accurate checks to be performed. For this reason, it is particularly suitable for the measurement of elements of components with simple shapes for which the tolerances are very narrow. However, the CMM does not guarantee the same results with different materials. In the case of zinc alloys, it is particularly suitable because the metal, differently from other materials such as plastics, does not run the risk of deforming during measurement.
Polyworks
Polyworks is the Innovmetric software that allows the tools of the metrology laboratory not only to be complete, but also complementary. What previously said about CMM and 3D scanner must not suggest that, during testing, a measurement method is to be chosen rather than another one. In fact, thanks to the software, it is possible to make the acquired data interact and to overlap the measurements of the 3D scanner with those of the CMM. For this reason, the software, allowing different data to interconnect, makes it possible to the metrology laboratory to unify its technologies for a complete and detailed final result.
UTM Machine
The Universal Testing Machine is the device employed in order to test tensile and compressive strength of a component. It is a very versatile machine that makes it possible to perform different kinds of tests on a wide range of materials and components. For example, concerning tests on zinc alloy die casts, the UTM is fundamental to work with the automotive sector. The verification of the resistance of products intended for this sector is in fact a fundamental part of the documentation that is necessary for the approval and the good outcome of projects.
In-line machine for the 100% dimensional control of production

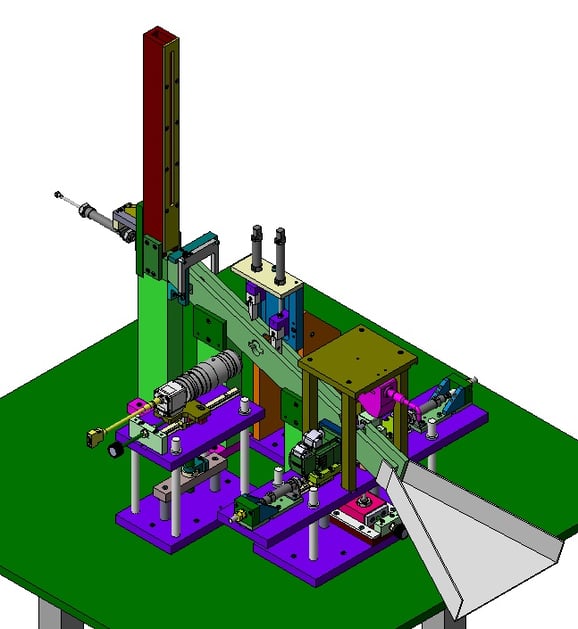
This in-house designed and developed machine is intended to the verification of the compliance with the dimensional tolerances of automotive components. The device uses a camera for the detection of dimensions, volume and superficial quality of the components and a profilometer. The profilometer, thanks to laser technology, allows the reconstruction of the profile of the measured component and it is particularly useful for the reconstruction of the profile of complex shapes such as threads.
Other devices
Eventually, other common but fundamental devices in a Zamak die casts productive plant are the spectrometer, the density scale and the electronic microscope. The spectrometer allows the chemical composition of Zamak to be analyzed and it is of fundamental importance when, on the same machine, the mold is changed, and we move from the production of a component to that of another in different alloy. Thanks to the spectrometer in fact it is possible to verify that Zamak bath is concluded and that all the material employed in the process is the new one. The density scale is used to verify the compactness of the component and to exclude the presence of air inclusions or other similar flaws. Finally, the microscope makes it possible to detect superficial defects that would not be identifiable at sight, proving to be a valid aid in detecting cold laps, laminations, cracks and lakes.
For further information on the most common die casting defects we suggest you to read the article Die casting defects: internal and superficial.
Other tests
The various tests carried on in a metrology laboratory are aimed at measuring the dimensions of the components, their weight, the internal distribution of the material and their resistance. Moreover, other kinds of tests can be carried out, such as for example salt spray testaimed at evaluating the resistance of the component to environmental corrosion or the leak test that through the employment of dedicated tools, aims at verifying the absence of air inclusions in the component.
Conclusions
With this brief overview on the tools of the metrology laboratory we wanted to focus the attention on the importance of this department.
If you are interested in this theme and you want to be updated on the news of the sector we suggest you to visit Metrology News web site, an important online review rich in information on metrology tools and their employment in different industrial sectors.

